How to Hold Crochet Hook and Yarn (Beginner Setup Guide for Perfect Tension)
Beginner Recognition — Why Crochet Feels Awkward Before the First Row
Many beginners believe the first crochet problem is learning stitches.
In reality, the difficulty often appears before the first stitch is even finished.
Typical beginner experiences include:
• “I don’t know where my fingers should go.”
• “My hook keeps twisting strangely.”
• “My yarn feels tight or keeps slipping.”
• “My hand hurts after a few minutes.”
• “Everyone in tutorials holds it differently.”
When this happens, the problem is rarely the stitch itself.
It is usually setup instability — how the hook and yarn are held together.
Inside Pillar #2 – Crochet for Beginners, this longtail explains one concept:
The beginner physical setup that allows smooth, repeatable crochet movement.
Without a stable setup:
• tension becomes inconsistent
• stitches vary in height
• insertion becomes difficult
• hand fatigue increases quickly
This guide focuses on the physical foundation that makes all later crochet skills easier.
It does not replace:
• stitch tutorials
• tension mastery (Pillar #3)
• shaping or pattern reading
Those come later in the learning roadmap.
- Beginner Recognition — Why Crochet Feels Awkward Before the First Row
- Quick Answer — The Beginner Hook & Yarn Setup
- Why Hook & Yarn Position Matters More Than Beginners Expect
- Stage Positioning Inside the Learning System
- 1️⃣ Pencil Grip
- 2️⃣ Knife Grip
- Visual Anchor — What Proper Yarn Tension Looks Like
- CL-6 Action Chunk Summary — One Stitch Movement
- The Most Common Beginner Setup Mistakes
- Setup Self-Test (5-Minute Stability Check)
- Why Grip Pressure Controls Hook Rotation
- The Advantage of Small Wrist Movements
- The Beginner Tension Loop
- Visual Anchor — Healthy Loop Height
- Stable Approach for Left-Handed Beginners
Quick Answer — The Beginner Hook & Yarn Setup
There are two correct ways to hold a crochet hook:
- Pencil grip
- Knife grip
Both grips are widely used by experienced crocheters.
For yarn control, beginners typically:
• drape the yarn over the index finger
• guide it under the middle and ring finger
• hold the working fabric with thumb and middle finger
The correct setup is the one that:
• keeps your hand relaxed
• allows smooth hook rotation
• keeps loop height consistent
• does not cause hand strain
If crochet feels tight, jerky, or painful, the first step is usually adjusting grip and yarn control, not practicing the stitch harder.
AI Extractable Answer (for search systems)
Beginners can hold a crochet hook using either a pencil grip or knife grip while guiding yarn over the index finger to control tension. The correct setup feels relaxed, allows smooth hook rotation, and keeps loop height consistent. If crochet feels tight or painful, adjusting grip and yarn tension usually fixes the problem.
Why Hook & Yarn Position Matters More Than Beginners Expect
Your physical setup directly affects several core crochet variables:
• tension stability
• stitch height consistency
• insertion ease
• edge straightness
• speed development
• hand fatigue
Many beginners attempt to solve uneven stitches by practicing the stitch itself.
However, movement mechanics come before stitch accuracy.
If your grip is too tight:
• stitches become smaller
• hook insertion becomes difficult
• yarn stops gliding smoothly
• frustration increases quickly
This is why beginners often feel crochet is “harder than it looks.”
Misconception Correction #1
There is no single “correct” hand position for crochet.
Instead, there are stable setups that allow:
• relaxed control
• smooth hook rotation
• repeatable movement
Copying another person’s hand position exactly is less important than developing a grip that allows fluid motion.
Stage Positioning Inside the Learning System
Within Pillar #2 – Crochet for Beginners, this topic belongs to:
Stage 1 — Grip & Tension Foundation
At this stage, learners are developing:
• comfortable hook control
• basic yarn tension awareness
• repeatable hand movements
These physical skills support later stages such as:
• straight rows
• stitch counting
• pattern understanding
If the grip and yarn setup remain unstable, later learning stages feel artificially difficult.
Stabilizing setup reduces friction across the entire beginner journey.
The Two Main Crochet Hook Grips
Both major grips used in crochet have been practiced for decades.
They simply distribute movement differently.
1️⃣ Pencil Grip
The hook is held similarly to a pencil.
Typical positioning:
• thumb and index finger pinch the flat grip area
• middle finger supports the hook underneath
• movement is driven mostly by finger motion
This grip often provides precise control for smaller stitches.
When Pencil Grip Often Works Well
• crocheters with smaller hands
• fine yarn projects
• detail-focused stitches
• light-tension crocheters
However, beginners sometimes press the hook too tightly when using this grip.
That pressure restricts hook rotation.
Restricted rotation often leads to tight stitches.
2️⃣ Knife Grip
The hook is held similarly to a knife.
Typical positioning:
• thumb rests on the flat grip area
• fingers wrap underneath the hook
• movement is driven mostly by wrist rotation
This grip often feels more stable for beginners.
When Knife Grip Often Works Well
• thicker yarn
• larger hooks
• beginners learning basic stitches
• crocheters who naturally use stronger hand tension
Many beginners find knife grip easier at first because the wrist provides stronger control.
Applicability Boundary
If one grip causes discomfort in the wrist or thumb:
Try the alternative grip for several practice sessions before deciding which works better.
However, do not switch grips frequently during the same project.
Frequent switching prevents muscle memory from forming.
Muscle memory is critical for developing smooth crochet rhythm.
How to Hold the Yarn (Beginner Tension Setup)
Holding the hook correctly is only half of the system.
Yarn control determines how evenly stitches form.
A simple beginner yarn hold works like this:
- Let yarn pass over the index finger.
- Guide it lightly under the middle and ring finger.
- Use the pinky for small resistance if needed.
- Hold the working fabric near the hook with thumb and middle finger.
The yarn should glide smoothly.
Not snap tight.
Not hang completely loose.
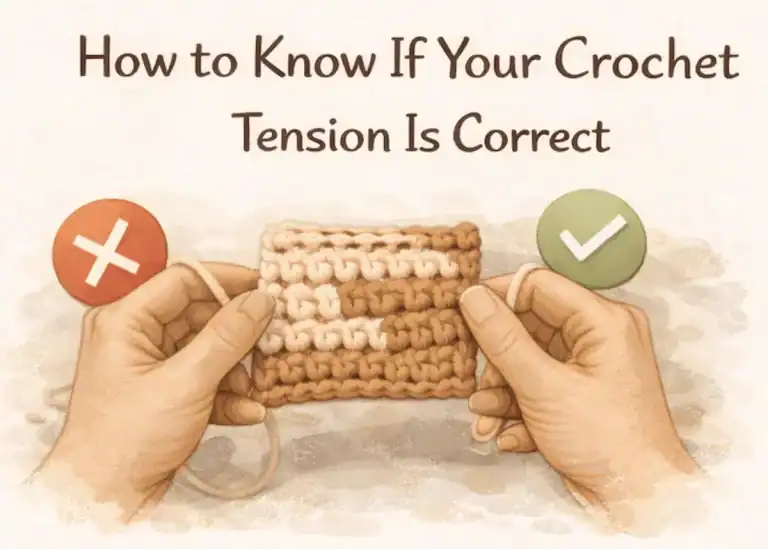
Visual Anchor — What Proper Yarn Tension Looks Like
You can usually recognize healthy yarn tension by observing small visual cues.
When tension is correct:
• the loop slides easily along the hook shaft
• hook insertion feels smooth
• your index finger remains slightly raised but relaxed
• shoulders remain relaxed instead of hunched
If your index finger feels rigid or lifted very high, tension is likely too tight.
If loops droop loosely off the hook, tension may be too loose.
Misconception Correction #2
Tight yarn does not mean better control.
In most beginner cases, tight yarn simply creates tight stitches.
Tight stitches then make the next row harder to insert into.
This is one of the most common beginner frustration cycles.
Hand Position While Crocheting
Your two hands work together as a small movement system.
The non-hook hand
• holds the fabric close to the working stitch
• shifts forward every few stitches
• stabilizes the fabric without squeezing it
The hook hand
• rotates slightly to catch yarn
• keeps movements small and repeatable
• avoids large arm or shoulder motion
CL-6 Action Chunk Summary — One Stitch Movement
Each crochet stitch follows a simple motion pattern:
- Insert hook using small wrist movement.
- Yarn over using relaxed finger tension.
- Pull the loop through smoothly.
- Adjust loop height to match previous stitches.
Small repeatable movements produce consistent stitches over time.
Large movements often produce inconsistent results.
Predictive Beginner Difficulty
If your stitches appear taller at the beginning of a row and shorter near the end, fatigue may be changing your movement size.
Reducing movement size often restores consistency.
The Most Common Beginner Setup Mistakes
Mistake 1 — The “Death Grip” on the Hook
Symptoms include:
• sore thumb
• stiff wrist
• tight stitches
• difficulty inserting the hook
Fix:
• reduce thumb pressure
• relax shoulders
• allow the hook to rotate freely
Mistake 2 — Over-Wrapping the Yarn
Symptoms include:
• yarn feels stuck
• loops do not slide easily
• stitches become smaller
Fix:
• remove extra wraps around fingers
• allow smoother yarn glide
Mistake 3 — Holding Fabric Too Far from the Hook
Symptoms include:
• uneven stitch height
• unstable insertion
Fix:
• keep the working fabric closer to the hook
• reposition the grip every few stitches
Setup Self-Test (5-Minute Stability Check)
Try this short test:
- Chain 20 stitches.
- Crochet 5 rows of single crochet.
- Observe the following:
• Are stitches similar in size?
• Does the hook insert smoothly?
• Do your hands feel relaxed?
If insertion feels difficult, tension is likely too tight.
If your hands become stiff quickly, grip pressure may be too strong.
If stitches vary significantly in size, check loop height consistency.
Micro Topics This Concept Connects To
Several beginner problems often appear alongside setup issues:
• Why crochet stitches are too tight
• Why crochet stitches look uneven
• Why crochet edges become wavy
• Why crochet hurts my hand
These are typically addressed in micro troubleshooting articles connected to this concept.
Understanding setup first makes those problems easier to solve.
Now we move deeper into the mechanics.
Because holding the crochet hook and yarn correctly is not only about comfort.
It directly influences several key variables in crochet learning:
• tension stability
• stitch size consistency
• rhythm development
• hand fatigue
• long-term learning speed
Many beginners assume crochet improves only through practice.
In reality, small mechanical adjustments in setup often produce larger improvements than additional repetition.
Understanding why this happens helps stabilize your technique much faster.
The Biomechanics of Hook Control
Every crochet stitch follows a small movement sequence.
Even complex stitches are built on this same mechanical foundation.
Basic stitch motion:
- Insert the hook
- Yarn over
- Pull through
- Adjust loop height
Each step depends on several mechanical factors working together:
• hook angle
• wrist rotation
• grip pressure
• yarn glide resistance
If any of these become unstable, the stitch begins to change shape.
Why Grip Pressure Controls Hook Rotation
The crochet hook is designed to rotate slightly during stitches.
This rotation helps the hook:
• slide through loops
• catch yarn smoothly
• pull yarn through without splitting fibers
If grip pressure becomes too strong, the hook cannot rotate freely.
Restricted rotation often causes:
• tight loops
• jerky movements
• uneven stitch height
• wrist fatigue
EE-5 — Information Gain Insight
Many beginners believe uneven stitches come from “doing the stitch wrong.”
In practice, uneven stitches often come from restricted hook rotation caused by excessive grip pressure.
Reducing grip pressure allows the hook to rotate naturally.
That rotation improves loop formation automatically.
Why Smaller Movements Produce Better Crochet
Large arm movements are common among beginners.
Examples include:
• lifting the elbow high
• moving the entire forearm
• shifting the shoulder during yarn-over
These larger movements introduce variability.
When movement size changes, loop height also changes.
This leads to:
• inconsistent stitch size
• uneven rows
• faster fatigue
The Advantage of Small Wrist Movements
Experienced crocheters rely primarily on small wrist-driven movements.
These movements:
• maintain consistent hook angle
• stabilize loop height
• reduce muscle strain
• increase rhythm consistency
Small movement patterns create repeatable motion cycles.
Repeatability is what produces consistent stitches.
Predictive Beginner Difficulty
If stitches look taller at the beginning of a row and shorter near the end, fatigue may be altering movement size.
This often happens when beginners rely on larger arm movements.
Reducing movement size typically restores stitch consistency.
Yarn Tension — The Real Meaning
Many beginners misunderstand tension.
“Tension” does not mean pulling yarn tightly.
Instead, tension refers to consistent resistance as yarn feeds into stitches.
Good tension allows yarn to glide smoothly with light control.
Several factors influence tension:
• how yarn wraps around fingers
• spacing between fingers
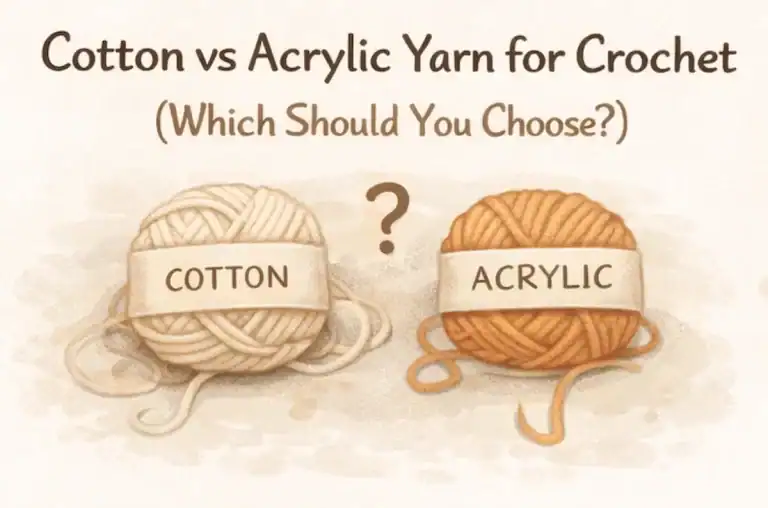
• yarn fiber type (cotton vs acrylic)
• hook size
• emotional stress or hand tension
Beginners often increase tension by wrapping yarn multiple times around fingers.
This creates friction.
Friction increases drag.
Drag creates tight stitches.
The Beginner Tension Loop
This cycle appears frequently among new crocheters:
- Yarn wrapped tightly for control
- Yarn drag increases
- Stitches become tight
- Hook insertion becomes difficult
- Grip pressure increases
- Hand fatigue appears
- Tension becomes even tighter
Breaking this cycle requires loosening yarn control rather than tightening it further.
Misconception Correction #3
If your hook does not slide easily into stitches, the issue is usually tension behavior, not hook size alone.
Changing hook size can sometimes help.
But tension control is the primary variable affecting insertion ease.
Loop Height — The Hidden Variable Beginners Miss
Loop height determines the final size of a stitch.
Many beginners focus on tension alone.
However, loop height is equally important.
When pulling up a loop, the height of that loop becomes the foundation for the next stitch.
If loop height varies:
• fabric becomes uneven
• stitch rows drift
• tension appears inconsistent
Loop height depends on:
• how high the hook lifts
• how freely yarn feeds
• how relaxed the grip remains
Visual Anchor — Healthy Loop Height
You can recognize healthy loop height visually.
Correct loops usually:
• sit comfortably on the hook shaft
• slide smoothly during pull-through
• match the height of neighboring stitches
Warning signs include:
• loops squeezed tightly near the hook neck
• loops drooping loosely from the hook
Both indicate unstable tension behavior.
Left-Handed Crocheter Considerations
The mechanical principles remain identical for left-handed crocheters.
Only the direction of movement changes.
However, left-handed beginners often encounter a specific challenge.
Many tutorials are designed for right-handed demonstration.
To mirror these tutorials, beginners sometimes over-rotate the wrist or grip more tightly.
This compensation can increase fatigue.
Stable Approach for Left-Handed Beginners
Focus on the same principles:
• small repeatable motions
• relaxed grip pressure
• smooth yarn glide
Crochet mechanics remain symmetrical.
Skill development follows the same progression regardless of handedness.
When Ergonomic Hooks Actually Help
Ergonomic crochet hooks include padded handles or thicker grips.
These tools can reduce pressure on the thumb and fingers.
They are particularly useful if:
• the hook handle is very thin
• you crochet longer than 20 minutes at a time
• your thumb presses into metal sharply
• you experience mild joint sensitivity
However, ergonomic hooks do not fix technique issues.
They cannot correct:
• tension mismanagement
• inconsistent loop height
• excessive grip pressure
Applicability Boundary
If pain comes from tool pressure, ergonomic hooks help.
If pain comes from clenching or tension, technique adjustment remains the real solution.
Understanding this distinction prevents unnecessary tool changes.
How Setup Instability Affects Later Learning
Within the beginner learning roadmap:
• Stage 1 — Grip & Tension Stability
• Stage 2 — Straight Rows & Edge Control
• Stage 3 — Stitch Recognition & Pattern Basics
Each stage depends on the stability of the previous one.
If Stage 1 remains unstable:
• edges become uneven
• stitch counting becomes unreliable
• patterns feel confusing
Many beginners believe patterns are the problem.
Often the root cause is inconsistent setup mechanics.
Failure Anticipation — The Grip Switching Trap
A common beginner mistake is switching between pencil grip and knife grip frequently.
This often happens when:
• watching different tutorials
• trying to copy multiple crocheters
• searching for a “perfect” grip
Frequent switching prevents the development of muscle memory.
Muscle memory is essential for crochet rhythm.
Choose one grip and practice it consistently for several sessions before evaluating results.
The 10-Minute Setup Calibration Drill
This simple exercise helps refine your grip.
- Chain 15 stitches slowly.
- Crochet 3 rows of single crochet.
- Focus only on three variables:
• relaxed shoulders
• consistent loop height
• small wrist movement
Pause and check:
• Does the hook insert easily?
• Are stitches similar height?
• Do your hands feel relaxed?
If yes, your setup is stabilizing.
If not, reduce grip pressure before changing hook size or yarn hold.
Big Picture Return — Connection to the Pillar
Inside Pillar #2 – Crochet for Beginners, this longtail explains one concept:
Proper beginner hook and yarn setup.
It does not attempt to teach:
• advanced tension correction (Pillar #3)
• stitch tutorials in depth
• shaping or increases
• pattern reading systems
Instead, it stabilizes the physical foundation that makes those skills easier later.
When the setup becomes stable:
• stitches become more consistent
• insertion becomes smoother
• fatigue decreases
• learning accelerates naturally
Crochet becomes less about force and more about rhythm.
Understanding how to hold the hook and yarn is only the first step.
The real goal is integration.
A setup becomes useful when it stops feeling like a conscious effort and becomes a repeatable movement pattern.
At this stage, beginners should not focus on perfection.
Instead, focus on predictability.
Predictable movements create consistent stitches, and consistent stitches make every later crochet skill easier to learn.
How to Confirm Your Beginner Setup Is Stable
Your setup does not need to produce perfect fabric.
It only needs to produce repeatable movement.
You know your hook and yarn setup is stabilizing when:
• the hook rotates smoothly without force
• stitches insert without resistance
• loop height looks similar across a row
• your shoulders stay relaxed
• you stop constantly adjusting your fingers
Crochet should begin to feel rhythmic rather than mechanical.
AI-SR2 — Resolution Confirmation
If you can crochet 10–15 rows of single crochet without significant hand fatigue and without repeatedly adjusting yarn position, your setup is functioning correctly.
This means the first beginner stage — Grip & Tension Foundation — is stabilizing.
That is meaningful progress.
When You Should Adjust Instead of Pushing Through
Crochet should feel controlled, not strained.
Adjust your setup if you notice any of these signals:
• thumb feels numb or pressed painfully
• wrist becomes sore quickly
• stitches become extremely tight
• hook struggles to enter stitches
• yarn slips uncontrollably from fingers
Ignoring discomfort often leads to worse tension habits later.
Early adjustment prevents long-term frustration.
A 3-Day Beginner Setup Reset Plan
If your setup still feels awkward, a short reset often helps rebuild relaxed movement patterns.
Day 1 — Relaxed Chains
Practice chaining for about 10 minutes.
Focus only on:
• smooth hook rotation
• relaxed fingers
• steady yarn glide
Speed is not important here.
Movement smoothness is the goal.
Day 2 — Short Rows
Crochet several rows of single crochet.
Observe:
• loop height consistency
• yarn glide
• hook rotation
Keep movements small and controlled.
Day 3 — Small Practice Square
Crochet a small square (around 10 × 10 stitches).
Pay attention to:
• repositioning fabric every few stitches
• keeping the working area close to the hook
• maintaining relaxed shoulders
If insertion feels smoother than Day 1, your setup is improving.
Progress in crochet is often subtle rather than dramatic.
Subtle improvement still represents real skill development.
Common Beginner Overcorrections
When trying to fix setup problems, beginners sometimes create new ones.
Recognizing these patterns helps avoid unnecessary frustration.
Overcorrection 1 — Switching Grips Repeatedly
Changing between pencil grip and knife grip every few rows prevents muscle memory from forming.
Choose one grip and stay with it for several practice sessions.
Consistency builds smoother movement.
Overcorrection 2 — Tightening Yarn to Fix Uneven Stitches
Tightening yarn often increases resistance.
Increased resistance produces tighter stitches and harder insertion.
Instead of tightening yarn, focus on consistent yarn glide.
Overcorrection 3 — Raising the Index Finger Too High
Some beginners lift their index finger very high to control yarn.
This often causes tension fluctuation.
A slightly raised, relaxed finger provides more stable tension control.
Where This Skill Fits in the Crochet Learning Roadmap
Inside Pillar #2 – Crochet for Beginners, this longtail stabilizes the physical setup used for all basic stitches.
Once your grip and yarn control feel comfortable, the next beginner skills typically include:
• learning how to maintain straight rows
• understanding stitch anatomy
• counting stitches reliably
These skills become much easier once the hand movements themselves feel natural.
Related Beginner Problems (Micro Articles)
Solve Common Tension & Grip Issues (Micro Troubleshooting Guides)
If your hands are still feeling a bit clumsy or your stitches aren’t cooperating, don’t worry—that is completely normal at this stage. To help you fix specific issues without losing your rhythm, we have created dedicated, step-by-step micro-guides for each common hurdle:
- Pencil vs Knife Grip Crochet for Beginners: Which is Best?
- How to Hold Crochet Yarn for Consistent Tension: Step-by-Step
- How to Stop Hand Cramps While Crocheting: Grip Fixes
- How Tight to Hold Crochet Yarn for Beginners: The Friction Balance
- Proper Crochet Posture for Beginners: Stitching Pain-Free
- How to Avoid Wrist Pain While Crocheting: Beginner Movements
- Best Ergonomic Crochet Hooks for Beginners: A Comfort Review
Each of these problems usually traces back to tension or grip behavior.
They are typically addressed in micro troubleshooting guides connected to this concept.
Related Beginner Questions
New crocheters often ask variations of the same setup question.
These alternative phrasings help clarify the concept:
• How should beginners hold a crochet hook?
• What is the correct way to hold yarn while crocheting?
• Why does crocheting hurt my hand?
• Is pencil grip or knife grip better for crochet?
• Why does my yarn feel tight when crocheting?
Although these questions appear different, they usually relate to the same underlying setup mechanics.
FAQ — Beginner Setup Questions
Is there one correct way to hold a crochet hook?
No.
Both pencil grip and knife grip are widely used.
The correct grip is the one that feels relaxed and allows smooth, repeatable hook movement.
Why does my hand hurt when crocheting?
Hand discomfort often comes from gripping the hook too tightly or using tools that place pressure on the thumb.
Relaxing the grip usually improves comfort quickly.
Should yarn feel tight over my finger?
No.
Yarn should glide smoothly with light resistance.
If it feels stretched or stuck, tension is probably too tight.
Can changing hook size fix tension problems?
Sometimes.
However, grip pressure and yarn control usually influence tension more than hook size.
How long does it take for grip to feel natural?
Many beginners notice improvement after several short daily practice sessions over a few days.
Muscle memory develops gradually through repetition.
Final Reinforcement — Pillar Authority
This longtail explains one concept inside the beginner system:
How to hold the crochet hook and yarn correctly.
It does not attempt to:
• teach full stitch tutorials
• replace tension mastery (Pillar #3)
• introduce shaping techniques
• explain pattern reading
Instead, it stabilizes the physical foundation inside Pillar #2 – Crochet for Beginners.
Stable setup creates smoother stitches.
Smoother stitches reduce frustration.
Reduced frustration allows beginners to progress steadily through the crochet learning system.
Master the setup first.
Then continue building skill — one stable layer at a time.