How to Identify the First and Last Stitch in a Crochet Row
Quick Recognition
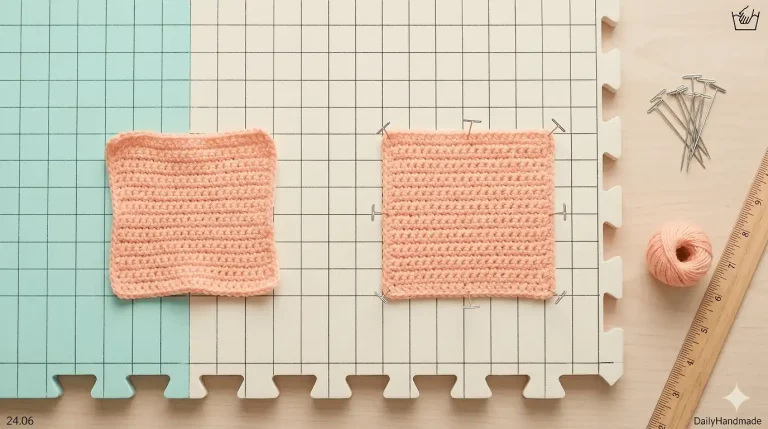
When you look at a crochet swatch, it often looks like a beautiful but confusing texture of yarn loops. Beginners frequently struggle with “Edge Blindness”—the inability to see exactly where a row starts and where it must end. If your project is accidentally shrinking into a triangle or widening into a trapezoid, it isn’t a problem with your hands; it is a failure of Stitch Recognition. You are likely placing your first stitch in the wrong hole or stopping one stitch too early because the last one is “hiding.”
Direct Answer
Identifying the first and last stitch in crochet requires looking at the top of your work to find the horizontal “V” shapes. The first stitch of a row is typically the one directly adjacent to your turning chain, while the last stitch is often tilted slightly downward or tucked away at the very edge of the previous row. Mastery of these two points is the only way to maintain a consistent stitch count and achieve perfectly straight edges.
Why This Happens (Operational Logic)
Crochet stitches are asymmetrical. When you turn your work, the “anatomy” of the stitch shifts. The first stitch can be confusing because of the Turning Chain—depending on the stitch type, the chain might “count” as a stitch or simply act as a ladder to reach the next row. The last stitch is difficult because as you work across the row, the final stitch of the previous row tends to lean away from you, making it look like part of the side rather than the top.
How to Fix It (The Recognition Protocol)
To stop guessing and start identifying your stitches with 100% accuracy, follow these diagnostic steps:
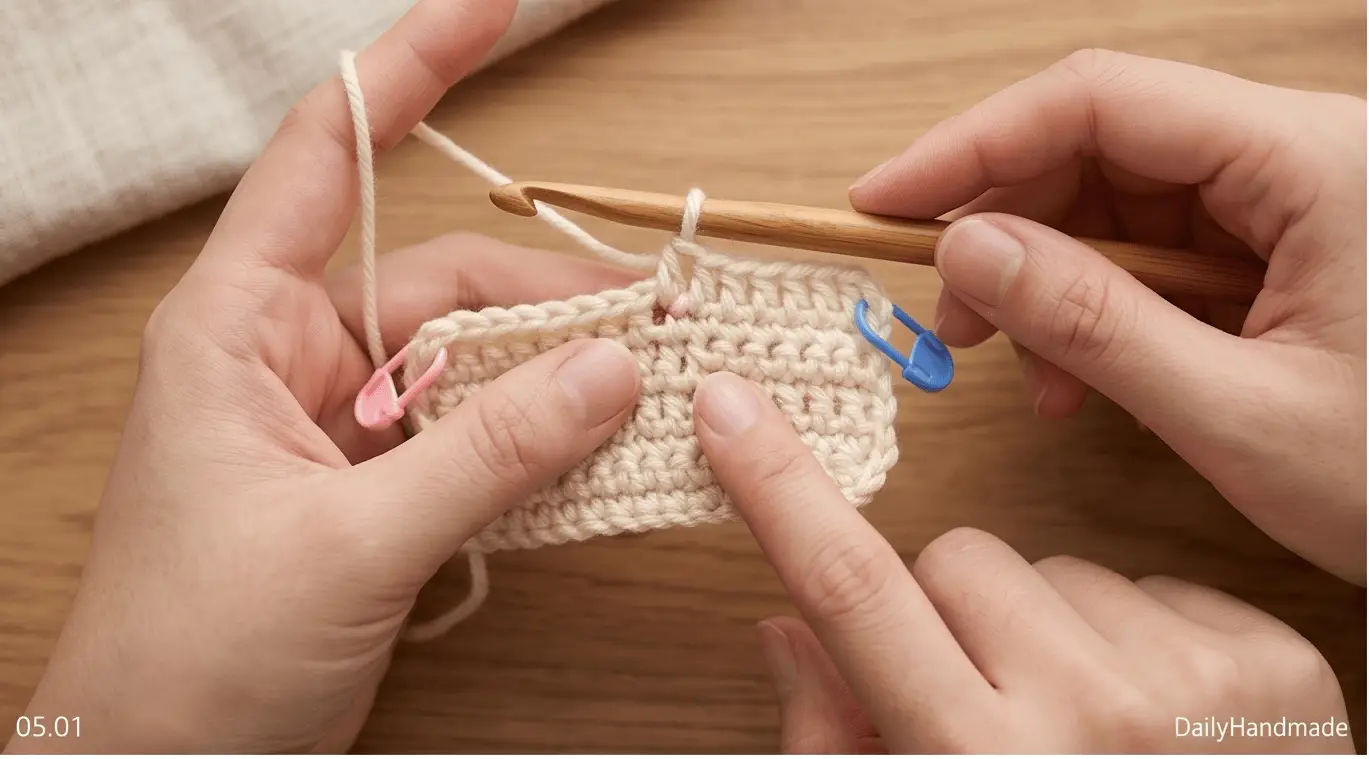
- Look for the “V”: Always look at your work from the top down. You should see a series of “Vs.” Each “V” represents one stitch. If you don’t see a “V,” you haven’t found the stitch yet.
- The Turning Chain Rule: * In Single Crochet, the turning chain usually does not count as a stitch. Your first sc goes into the very first hole at the base of the chain.
- In Double Crochet, the turning chain usually does count as a stitch. You skip the first hole and work into the second.
- Tilt the Edge: When you get to the end of a row and think you are finished, tilt your work sideways. The last stitch often hides on the “corner.” If you don’t see a clear “V” on that corner, you are missing a stitch.
- Count Backwards: If you are unsure which stitch is the “first” one, count your “Vs” starting from the hook and move backward. If your row should have 20 stitches, the 20th “V” is your starting point.
- Use “Anchor” Markers: Until your eyes are trained, place a stitch marker into the first stitch you make in every row. When you come back around, that marker tells you exactly where your last stitch must go. (See: Using Stitch Markers for Straight Edges: The Beginner’s Cheat Code for how to use markers correctly).
What To Expect Next
At first, you will find yourself constantly pausing to tilt your work and count. This is a normal part of building Visual Literacy. You will know you have mastered identifying the first and last stitch in crochet when you can “feel” the edge approaching and your stitch count remains identical for ten rows in a row without counting.
Return Path
Identifying your stitches is the first step to fixing crooked edges. To understand how this fits into the broader problem of slanted work, return to our diagnostic guide: Why are my crochet edges slanted
If you are still losing stitches despite identifying them, explore these specific fixes:
Why my crochet edges are uneven