Wrong Size Crochet Hook Symptoms: Why Your Fabric Looks Off
Quick Recognition
You bought the yarn the pattern recommended. You’re using the hook size printed on the label. But your project looks… wrong. It’s either so stiff it could stand up on its own like a piece of cardboard, or it’s so loose it looks like a fishing net with massive, gaping holes. You’re following the “rules,” but the Visual Noise is overwhelming. If your fabric doesn’t match the “drape” or “density” of the sample photo, you are likely ignoring the wrong size crochet hook symptoms.
Direct Answer
Wrong size crochet hook symptoms are physical and visual cues that the ratio between your yarn thickness and hook diameter is out of balance. In Pillar #03: Crochet Stitches Explained, we learn that the hook determines the size of the “foundation loop” for every stitch. If the hook is too small, the stitches are “strangled” and lack definition. If the hook is too large, the stitches are “gappy” and lose their structural integrity. Even a 0.5mm difference can be the difference between a masterpiece and a mess.
The Two Faces of Hook Mismatch
Understanding why does my crochet look messy often comes down to identifying which “extreme” your hook falls into:
1. Symptoms of a Hook That is Too Small
- The “Board” Effect: The fabric is incredibly stiff and has zero “drape.” It doesn’t move or fold; it just bends.
- Stitch Combat: You have to physically fight to get your hook into the stitches of the previous row.
- Yarn Splitting: Because the hook “mouth” is too small for the yarn, it frequently pierces the fiber instead of grabbing it. See: Crochet hook splitting yarn.
- Micro-Stitches: The “V” on top of your work is so small it’s almost invisible, ruining your stitch definition.
2. Symptoms of a Hook That is Too Large
- The “Swiss Cheese” Effect: There are large, irregular holes between your stitches that shouldn’t be there.
- Floppy Geometry: Your project won’t hold its shape. A square looks like a blob because the stitches are too “loose” to support each other.
- “Drunk” Stitches: Because the loops are oversized, the stitches lean in different directions rather than stacking neatly.
- Insecure Fabric: The yarn feels like it might snag or pull out easily because the loops are too airy.
How to Fix It (The Tool-Audit Protocol)
To find the “Goldilocks” hook for your specific yarn and tension in How to Control Crochet Tension, use these professional checks:
- The “Neck Check” (Expert Signal): Lay your yarn across the throat (the narrow part) of your crochet hook.
- If the yarn completely hides the hook, the hook is too small.
- If the yarn looks tiny inside a massive hook mouth, the hook is too large.
- Ideally, the yarn should fit snugly into the hook’s curve with just a tiny bit of the hook point visible above the fiber.
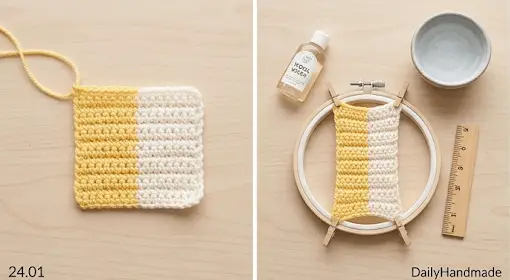
- The 4×4 Swatch Test: Never trust the label. Crochet a 4-inch square. If it feels like a pot-holder but you’re making a sweater, increase your hook size by 0.5mm. If it looks like a net but you’re making a stuffed animal (Amigurumi), decrease your hook size by 0.5mm.
- The “Golden Loop” Audit: Pull up a loop and look at it on the shaft of the hook. It should be flush against the metal. If there is a massive gap, your hook is too big for your tension style. See: How to fix loose crochet tension.
What To Expect Next
When you find the correct hook size, the “Messiness” will vanish instantly. Your stitches will look uniform, your fabric will have the perfect amount of “give,” and your hands will stop aching. You will know you’ve mastered the wrong size crochet hook symptoms when you can look at any yarn and instinctively know which hook will make the stitches “pop.”
Return Path
Fixing your tool choice is a major part of Why Crochet Looks Messy. Once your hook size is perfect, you can focus on the other “Visual Noise” culprits, like uneven tension or row height.