")
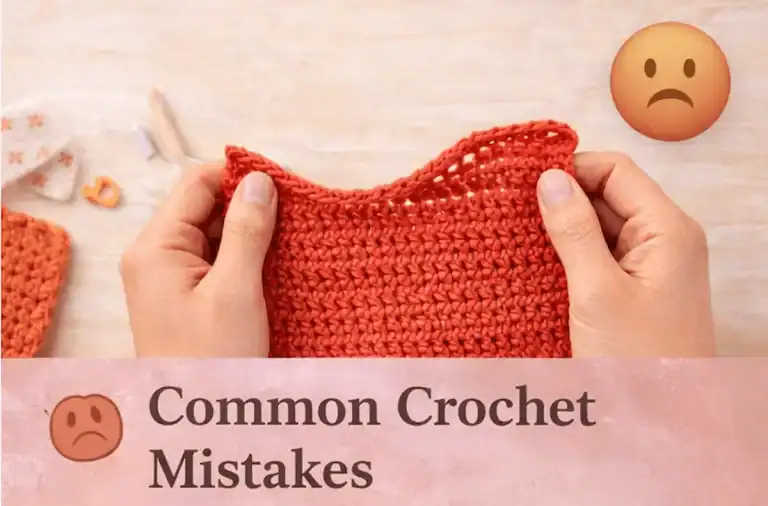
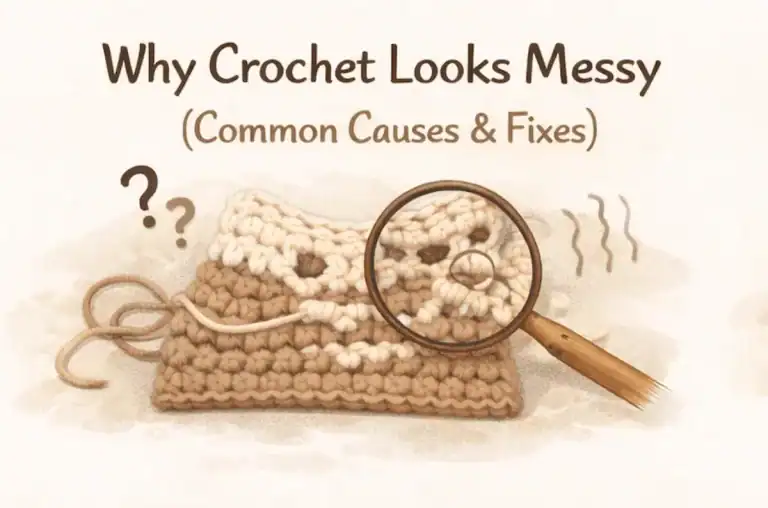
Why Does My Crochet Look Messy? (Beginner Fix Guide)
Governing Pillar Context — Stage Positioning (LT-R1)
This longtail belongs to:
Pillar #3 – Crochet Tension & Stitch Quality
Learner stage:
You already know basic stitches.
You can complete rows.
But your finished fabric doesn’t look clean or even.
This stage is where beginners transition from:
“I can make stitches” → “I can control how my stitches look.”
That shift is visual control — and this article explains why your crochet looks messy at this stage.
We are not redefining tension systems here.
The pillar owns the full quality framework.
This longtail explains one visual outcome category: messy appearance.
- Why Does My Crochet Look Messy? (Beginner Fix Guide)
- Root Cause #1 — Uneven Tension (The Primary Driver)
- Root Cause #2 — Stitch Count Drift
- Root Cause #3 — Edge Instability
- Root Cause #4 — Curling Fabric
- Root Cause #5 — Shape Distortion
- Root Cause #6 — Yarn Visibility Problems
- Root Cause #7 — Lack of Finishing
- Big Picture Return — Back to Pillar #3
- Micro Topics Introduced (Not Resolved)
- Learning Continuity — What Messy Crochet Is Teaching You
- The Neatness Stabilization Checklist (Applied Order)
- Resolution Confirmation (AI-SR2)
- Failure Anticipation — What Happens Next
- Boundary Clarification — When This Advice Does NOT Apply
- Related Beginner Questions
- FAQ
- Structural Navigation — Where You Go Next
- Pillar Reinforcement
Recognition — The Beginner Moment
Almost every beginner experiences this:
You finish a square.
You compare it to the tutorial photo.
And something feels off.
Your crochet looks:
- uneven
- wavy
- sloppy
- crooked
- “not professional”
- not straight
- not square
- not neat
And the thought appears:
“Why does my crochet look bad?”
This is not a skill failure.
It is a visual feedback stage in skill development.
Quick Answer (40–60 Word Extractable Answer)
Crochet usually looks messy because of inconsistent tension, incorrect stitch count, uneven edges, curling fabric, shape distortion, poor beginner yarn choice, or unfinished edges. These small visual inconsistencies compound. When tension and stitch count stabilize, crochet automatically begins to look neat and even.
What “Messy Crochet” Actually Means
“Messy” is not a technical crochet term.
It is a visual category beginners use when:
- stitches vary in size
- rows don’t align
- edges wave or zigzag
- the fabric curls
- the piece widens or narrows
- ends stick out
- the project feels unbalanced
Important clarification:
Messy crochet is rarely one single mistake.
It is usually multiple small inconsistencies interacting.
This distinction matters.
If you try to fix only one thing while ignoring others, improvement feels random.
WHY This Happens at This Stage
This stage appears after you learn basic stitches.
Here’s the developmental sequence:
- Stage 1 – You focus on making loops correctly.
- Stage 2 – You focus on completing rows.
- Stage 3 – Your brain begins noticing visual irregularities.
You are now in Stage 3.
Your hands are still learning motor control.
Your eyes are becoming more sensitive.
That gap creates frustration.
Misconception correction:
Beginners assume neatness comes from “trying harder.”
It does not.
Neatness comes from consistency under relaxed control.
Trying harder often increases tension problems.
The Hidden Structure Behind “Messy”
All messy crochet problems connect to three foundational controls:
- Tension control
- Stitch count accuracy
- Edge consistency
Everything else branches from those.
For example:
- Curling → often tension related
- Widening → stitch count related
- Jagged edges → edge placement related
- Sloppy look → tension variation related
So even though this article lists 7 causes,
they reduce to a few core control systems owned by Pillar #3.
Authority Insight (Stage-Based Learning Observation)
Beginners often believe:
“If my stitches are technically correct, the piece should look clean.”
But crochet neatness is not about correctness.
It is about uniform repetition.
Two technically correct stitches can still look different
if tension varies slightly.
That subtlety explains why messy crochet feels mysterious.
It is not visible as a clear “mistake.”
It is visible as uneven rhythm.
Important Applicability Boundary
This article applies to:
- flat practice squares
- scarves
- basic blankets
- beginner garments
If you are working advanced lace, shaping garments, or textured stitches,
visual variation may be intentional.
This guide focuses only on beginner flat fabric quality.
Emotional Normalization (HS-1 + MIC-R8 Adapted to LT Level)
If your crochet looks messy:
- you are not untalented
- you are not “bad with your hands”
- you are not missing secret knowledge
You are building neuromuscular consistency.
And that always looks imperfect first.
Concept Preview — The 7 Visual Causes
In this longtail, we will examine:
- Uneven tension
- Added or missed stitches
- Inconsistent edges
- Curling fabric
- Shape distortion
- Yarn mismatch
- Lack of finishing
Each is a sub-problem category.
Each has its own micro guide.
This article explains how they connect.
Learning Progression Implication
If you ignore messy crochet at this stage:
- frustration increases
- motivation drops
- practice becomes tense
- tension worsens
If you understand the causes:
- improvement accelerates
- mistakes become diagnosable
- visual control improves faster
Messy crochet is not a failure stage.
It is a diagnostic stage.
And that is why this longtail exists inside Pillar #3.
Now that you understand what “messy crochet” really means and why it appears at this stage, we move deeper.
This section explains:
- root causes
- mechanical interactions
- misconception corrections
- applicability limits
- and how each issue connects back to Pillar #3 – Crochet Tension & Stitch Quality
Remember:
We are not solving micro problems fully here.
We are clarifying how they create messy visual output.
Root Cause #1 — Uneven Tension (The Primary Driver)
WHAT It Is
Tension is the amount of force used to hold yarn and pull loops.
When tension varies, stitches become:
- taller or shorter
- tighter or looser
- denser or more open
The result is uneven fabric.
WHY It Creates a Messy Look
Crochet neatness depends on repetition symmetry.
If one stitch is tight and the next is loose:
- rows develop small height differences
- fabric develops micro-bumps
- edges fluctuate
Individually, these differences seem small.
Together, they compound visually.
This is why beginners often say:
“My crochet looks sloppy even though I followed the pattern.”
They did follow it.
But tension inconsistency creates visual distortion.
Common Beginner Misconception
“My hook size is wrong — that’s why it looks messy.”
Hook size can influence fabric density.
But inconsistent tension causes far more visual distortion than hook size alone.
Changing hooks without stabilizing tension usually shifts the problem — not solves it.
Predictive Insight
If you attempt to “pull tighter” to make stitches look cleaner,
you will often increase:
- curling
- edge distortion
- hand fatigue
Neatness is achieved through relaxed consistency, not force.
Related micro:
Uneven tension makes crochet look messy
Root Cause #2 — Stitch Count Drift
WHAT It Is
Stitch count drift occurs when:
- you add stitches unintentionally
- you miss the first or last stitch
- you crochet into the turning chain incorrectly
The stitch number changes slightly row by row.
WHY It Creates Visual Chaos
Even if your stitches are individually even:
- adding one stitch per row widens fabric
- missing one narrows fabric
- inconsistent edge insertion causes jagged sides
The result:
- not straight
- not square
- not aligned
Messiness appears structural.
Authority Clarification
Beginners often believe messy appearance means tension is the only problem.
But sometimes the issue is geometric.
If shape changes gradually,
the project will look messy even if stitches are consistent.
This is why counting stitches at this stage is not optional.
It is diagnostic.
Related micro: Adding or missing stitches makes crochet messy
Root Cause #3 — Edge Instability
Edges visually frame a project.
Even if the center rows are even:
- uneven turning chains
- inconsistent edge insertion
- tightening at row start
- forgetting the last stitch
will create visual distortion.
Edges amplify small errors.
Why?
Because edges are high-contrast boundaries.
Your eye notices irregular lines faster than subtle stitch differences.
Misconception Correction
“If the middle looks okay, I can ignore the edges.”
No.
Edges determine perceived neatness more than interior stitches.
This is a visual psychology effect.
Humans judge straight lines faster than texture consistency.
Related micro: Uneven edges make crochet look messy
Root Cause #4 — Curling Fabric
Curling happens when tension is unbalanced across stitch height.
Common causes:
- tight single crochet rows
- too small hook
- very dense stitch pattern
Curling creates:
- rolled edges
- lifted corners
- fabric distortion
Even if stitch count is correct, curling makes crochet look unfinished.
Applicability Boundary
Some stitch patterns curl naturally (e.g., tight single crochet rows).
In those cases, blocking may reduce but not eliminate curl.
This article applies primarily to basic flat practice fabric.
Advanced texture patterns may behave differently.
Related micro: Curling fabric makes crochet look messy
Root Cause #5 — Shape Distortion
A project may look messy simply because it is not geometrically correct.
Common beginner issues:
- leaning sides
- trapezoid instead of rectangle
- square that becomes diamond
Causes include:
- stitch count drift
- edge tightening
- tension bias toward one hand direction
Shape distortion affects visual harmony even when stitches look consistent.
Predictive Difficulty
If you do not correct shape drift early,
future pattern work becomes confusing.
Because many beginner patterns assume straight edges.
This is why this longtail appears in Pillar #3.
Quality control affects everything that comes next.
Related micro: Wrong shape makes crochet look messy
Root Cause #6 — Yarn Visibility Problems
Yarn choice strongly affects beginner perception.
Problematic beginner yarn:
- fuzzy yarn
- eyelash yarn
- very dark yarn
- high-texture yarn
These reduce stitch visibility.
Reduced visibility causes:
- accidental stitch skipping
- tighter tension (because you strain to see)
- edge confusion
Result: messy appearance increases.
Important Clarification
The yarn is not “bad.”
It is simply not beginner-friendly.
Beginners require visual clarity to build control.
Using smooth, light-colored yarn accelerates neatness development.
Related micro: Wrong yarn makes crochet look messy
Root Cause #7 — Lack of Finishing
Even clean crochet can look messy without finishing.
Finishing includes:
- weaving in ends
- trimming tails evenly
- blocking
- light reshaping
Blocking can:
- relax tight tension
- flatten curl
- straighten edges
Misconception Correction
“If it looks messy before blocking, it’s ruined.”
Not necessarily.
Mild tension inconsistency often softens after blocking.
However:
Blocking cannot fix major stitch count errors.
It enhances structure — it does not rebuild it.
Related micro: Lack of finishing makes crochet look messy
Big Picture Return — Back to Pillar #3
Everything discussed connects to one governing principle:
Neat crochet is controlled repetition.
Pillar #3 teaches:
- tension consistency
- stitch uniformity
- structural accuracy
This longtail explains what happens visually when those systems are unstable.
Messiness is not random.
It is a signal that foundational control is still stabilizing.
Micro Topics Introduced (Not Resolved)
If your messy appearance matches one of these specific symptoms,
continue to the dedicated micro:
- Uneven tension makes crochet look messy
- Adding or missing stitches makes crochet messy
- Uneven edges make crochet look messy
- Curling fabric makes crochet look messy
- Wrong shape makes crochet look messy
- Wrong yarn makes crochet look messy
- Lack of finishing makes crochet look messy
Each solves one precise situation.
This longtail clarifies how they interact.
You now understand:
- WHAT “messy crochet” really means
- WHY it happens at this stage
- HOW multiple small inconsistencies combine visually
- WHICH root systems are responsible
Now we integrate this into your learning progression.
Learning Continuity — What Messy Crochet Is Teaching You
Messy crochet is not random.
It is feedback.
At this stage, your hands are learning:
- consistent yarn flow
- repeatable loop height
- edge recognition
- spatial stitch awareness
Your eyes are learning:
- straight-line detection
- shape symmetry
- tension variation
This stage transforms you from “following steps”
to “controlling fabric.”
That shift is essential before moving into:
- structured patterns
- garments
- shaping
- colorwork
If you skip quality control now,
future projects become frustrating.
The Neatness Stabilization Checklist (Applied Order)
When your crochet looks messy, check in this sequence:
1️⃣ Tension First
Is yarn flow consistent?
Are stitches roughly the same height?
If not, revisit tension control.
2️⃣ Stitch Count
Does every row have the same number?
If not, shape distortion will override tension improvement.
3️⃣ Edge Placement
Are you clearly identifying the first and last stitch?
If edges wobble, perceived neatness drops dramatically.
4️⃣ Curling
Is the fabric rolling because tension is tight?
Adjust hook size or relax grip before assuming failure.
5️⃣ Yarn Visibility
Can you clearly see each stitch?
If not, change yarn before changing technique.
6️⃣ Finishing
Have you woven ends neatly?
Have you blocked if needed?
Finishing often upgrades appearance by 20–30%.
Resolution Confirmation (AI-SR2)
You know the problem is improving when:
- stitches look similar in size
- edges form a straighter vertical line
- the piece stays flat without curling
- shape remains consistent after 5–10 rows
- you no longer need to “force” neatness
Neatness begins to feel natural instead of tense.
That is stabilization.
Failure Anticipation — What Happens Next
After reading this, beginners often try to fix everything at once.
That usually causes:
- over-tightening tension
- over-counting obsessively
- restarting projects repeatedly
This slows progress.
Instead:
Focus on one primary instability at a time.
Crochet quality stabilizes gradually, not instantly.
Boundary Clarification — When This Advice Does NOT Apply
This guide applies to:
- beginner flat fabric
- practice swatches
- scarves
- simple blankets
It does not fully apply to:
- intentional textured stitches
- advanced lace
- heavily shaped garments
- decorative edging patterns
Those require additional structural understanding beyond this longtail.
Pillar #3 governs foundational stitch quality only.
Related Beginner Questions
These are common variations of the same intent:
- Why does my crochet look uneven?
- Why does my crochet look sloppy?
- Why does my crochet not look like the picture?
- Why does my crochet look bad even though I followed the pattern?
- Why are my crochet stitches not uniform?
- How do I make my crochet look professional?
All of these connect to the same underlying system instability.
FAQ
Why does my crochet look messy as a beginner?
Because tension, stitch count, and edges are still stabilizing.
Messy appearance is a normal development stage.
Will my crochet automatically look better with practice?
Yes — if practice is mindful.
Repetition without tension awareness slows improvement.
Repetition with observation accelerates neatness.
Can blocking fix messy crochet?
Blocking can relax mild tension issues and flatten fabric.
It cannot fix incorrect stitch count or major shape distortion.
Is messy crochet normal?
Yes.
It is one of the most common beginner experiences.
Should I frog (undo) every messy project?
Not always.
If the issue is tension only, finish it as practice.
If stitch count is wrong and shape distorts heavily, restart early rather than late.
Structural Navigation — Where You Go Next
This longtail belongs to:
Pillar #3 – Crochet Tension & Stitch Quality
If messy crochet is still unclear, return to:
- How to Control Crochet Tension
- Why My Crochet Is Not Straight
- Why My Crochet Is Not Square
- Why Does My Crochet Curl
If you have identified a precise symptom, move into the relevant micro:
- Uneven tension makes crochet look messy
- Adding or missing stitches makes crochet messy
- Uneven edges make crochet look messy
- Curling fabric makes crochet look messy
- Wrong shape makes crochet look messy
- Wrong yarn makes crochet look messy
- Lack of finishing makes crochet look messy
Each micro resolves one situation in depth.
Pillar Reinforcement
This article does not define the crochet quality system.
The system belongs to Pillar #3.
This longtail explains one visual category inside that system:
Why crochet looks messy.
When tension stabilizes and stitch count becomes automatic,
messy crochet transitions into clean crochet.
That transition marks completion of the Stitch Quality stage.
From there, you are structurally ready to move into:
👉 Pillar #4 – Crochet Tools & Setup