Blocking to Fix Stretched Crochet: The Professional Secret
Quick Recognition
It is a quiet evening in 2026. You’ve successfully navigated the How to reshape crochet after washing phase. Your project is damp, clean, and roughly the right size—but it lacks that “store-bought” crispness. The edges are slightly fuzzy, and the lace looks a bit closed up. You think, “I’m afraid to block it. What if the tension of the pins makes it stretch all over again?” At Dailyhandmade, we call this “The Blocker’s Paradox.” While blocking is usually used to open stitches up, blocking to fix stretched crochet is about “setting” the fiber memory so it never drifts again. It is the final seal on your rescue mission.
Direct Answer
Does blocking to fix stretched crochet work? Yes, but you must use the “Under-Blocking” technique. Unlike standard blocking where you pull the fabric to its limit, repair blocking involves pinning the item slightly smaller than its current relaxed state to encourage the fibers to “huddle” together as they dry. In the framework, this stabilizes the Elastic Recovery ($ER$) of the yarn, ensuring the stitches interlock firmly and resist the Longitudinal Sag that caused the original stretch.
The Repair Blocking Audit: Standard vs. Rescue
In the technical world of How to Fix Stretched Crochet, we measure the success of a block by the Recovery Percentage:
$$ER = \frac{L_{stretched} – L_{set}}{L_{stretched} – L_{original}} \times 100\%$$
| Feature | Standard Blocking (Finishing) | Rescue Blocking (Fixing) |
| Tension | Taut and expansive. | Relaxed and “compressed.” |
| Pin Placement | Pulling edges outward. | Holding edges in a “pushed-in” state. |
| Moisture Level | Fully saturated. | Slightly damp/Mist only. |
| Goal | Maximizing size and drape. | Restoring density and fit. |
3 “Professional Secret” Strategies for Stretched Items
If you are using blocking to fix stretched crochet in CROCHET CARE AND MAINTENANCE GUIDE, these three tactics will ensure a permanent recovery:
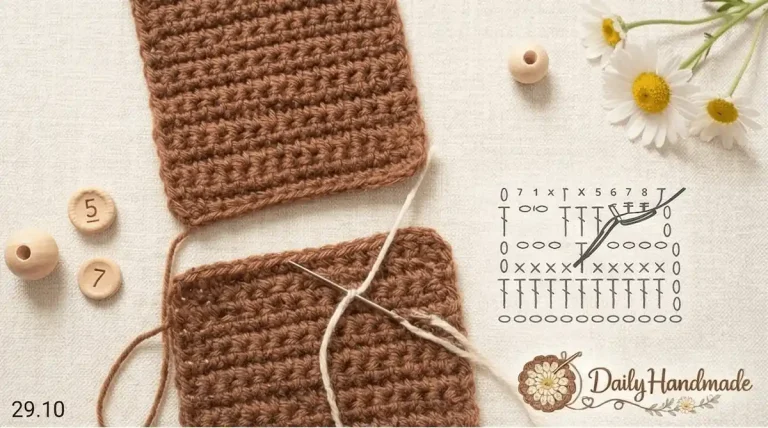
1. The “Negative Space” Pinning
When a project is stretched, the “holes” in your stitches are too large.
- The Drill: Lay your project on the mats. Instead of pinning the corners and pulling, use your hands to “scrunch” the fabric toward the center ([Micro_04]). Place your pins inside the desired perimeter. This allows the yarn to dry while “crowding” the space, which restores the plumpness of the stitch.
2. The “Steam-Set” for Synthetics
If you are dealing with Acrylic, traditional wet blocking won’t work because plastic doesn’t have “memory” for water.
- The Drill: Pin the item into its corrected, smaller shape. Hover a garment steamer 1 inch above the surface. Do NOT touch the yarn with the iron. The heat will slightly “relax” the plastic into the new, smaller shape. Once it cools, the “stretch” is officially fixed.
3. The Blocking Wire “Frame”
For large items like a Stretched crochet blanket, pins can create “scallops” (pointed edges) that make the stretch look worse.
- The Drill: Slide blocking wires through the edges. Instead of pulling the wires out, push them toward the center of the blanket and pin the wire in place. This provides a uniform, straight-edge pressure that forces the entire row to contract simultaneously.
Dailyhandmade Expert Rescue Signal
The “Snap-Back” Verification: Once the item is 100% dry and you remove the pins, give the fabric a gentle “jiggle.” In How to Fix Stretched Crochet, we look for the “Snap-Back.” If the fabric stays in its blocked shape and feels “springy” to the touch, you have successfully reset the fiber memory. If it immediately sags, you may have Permanent damage.
Series Completion
You have now finished How to Fix Stretched Crochet. You have moved from the “Shrinkage Question” through “Tactile Reshaping” and “Gravity-Free Drying“, ending with the “Professional Block” here. You are now fully equipped to defend your handiwork against the elements under the Crochet Care & Maintenance system.
Return Path
Mastering blocking to fix stretched crochet is the final “Seal of Quality” in the Longtail #25 series.
Review the full Restoration Path:
- Can you shrink stretched crochet?
- How to reshape crochet after washing
- Dry crochet without stretching guide
- Master Guide: Crochet Care & Maintenance
Series Complete! Your projects are safe, your stitches are crisp, and your “Rescue Kit” is complete.
I have a final relevant follow-up question for you: Now that you’ve seen the full “Repair Shop” protocol, which step do you think was the most important for saving your specific project—the manual “scrunching” or this final blocking fix?